How to Upload Custom Fonts in After Effects
Create a font
I used to waste way likewise many hours trawling through fonts lists, desperately trying to observe the right one, merely with nothing really hitting the spot. Eventually, I realised it might be a good thought if I started reaching for my pen and pad to pattern my ain solutions, rather than getting bogged down in those nightmare lists of indecision.
Getting familiar with the ins and outs of characters, and trying to capture the mood you're wanting to convey with typography is a handy skill set. Yeah, it takes practice, but each time you lot try, you'll learn a whole heap of new things.
For instance, designing your ain type actually helps you appreciate how subtle differences tin can accept a big overall effect and how the wrong type choices can really irksome your concept.
This tutorial is going to assist go y'all get started with making your ain fonts. Over the next three pages, I'thou going to share with you a technique and procedure I've adult over the years.
Outset, you'll need to get your materials in order. Zip likewise fancy: just some A3 tracing newspaper, a 2H pencil, fine liners, a practiced safety, sharpener, ruler and some masking tape. Let's brainstorm.
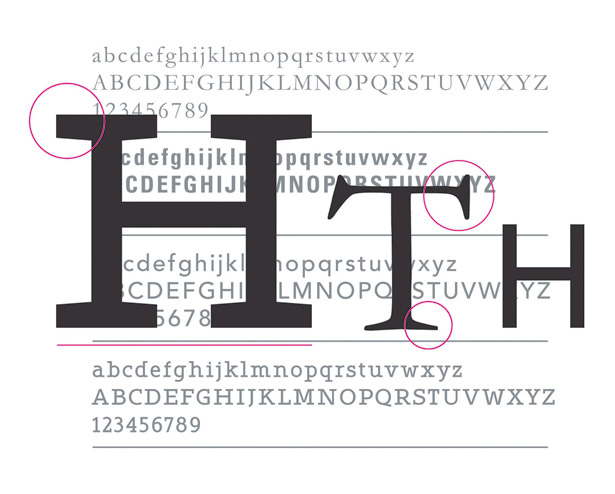
1 Study fonts
Begin by familiarising yourself with the characters in fonts. Open up a program such equally Adobe InDesign or Illustrator and type out the alphabet in a few favourites. Define why you similar them, and what consistencies and inconsistencies are credible.
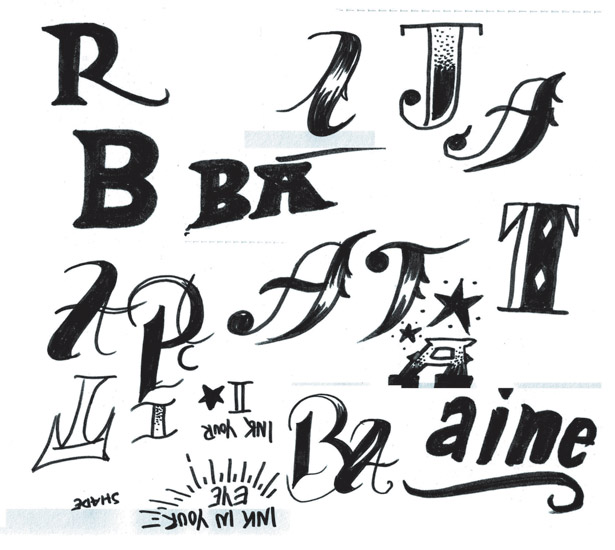
2 Start sketching
Next, open up up your sketchbook and begin loosely experimenting with different typefaces. Starting time by drawing some characters from your favourites list; as you lot build in confidence, begin adding your own. There'southward no right or wrong at this stage, so just play.
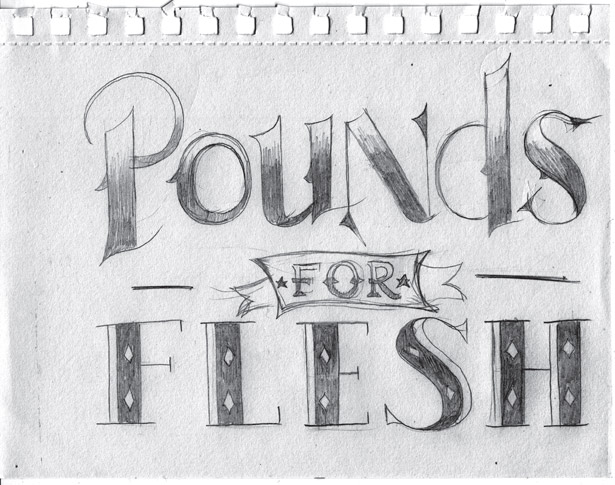
3 Sketch loosely
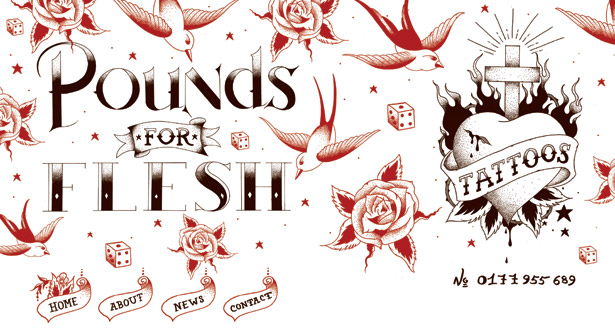
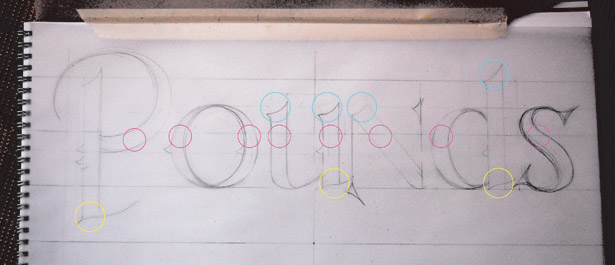
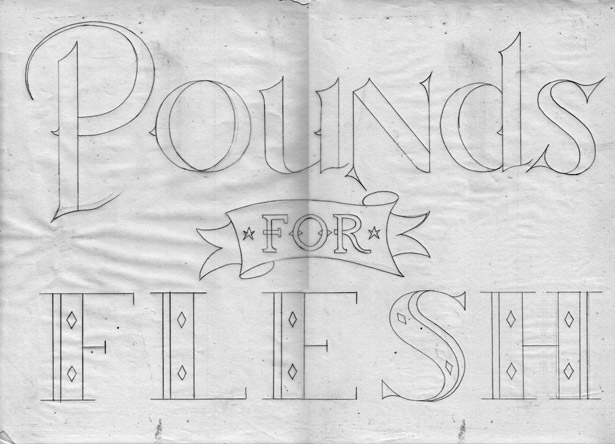
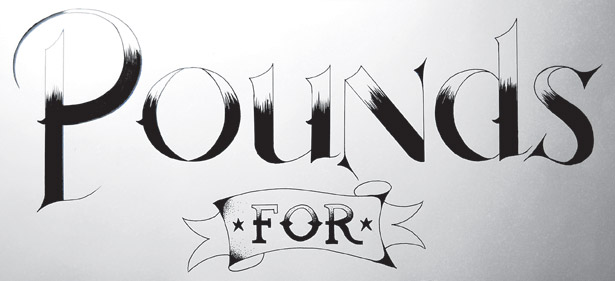
You should at present be confident enough to use a concept to aid necktie all your sketching together. Here, we're creating the main typography for a fictional tattoo parlour chosen 'Pounds for Flesh'. You tin can utilize the file Loosesketchreference.jpg for inspiration.
four Two sheets
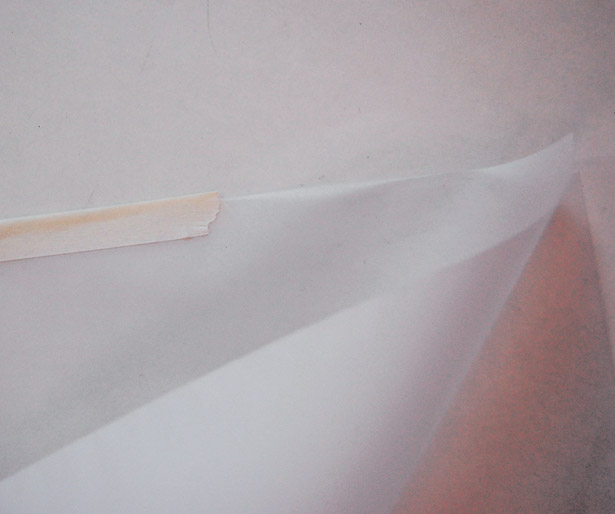
In one case you're happy with your loose sketch, information technology'south time to offset a bigger, more focused version. Get ii loose sheets of tracing paper and line them up on top of one another. Utilise a strip of masking tape to stick them together, folding it over the top.
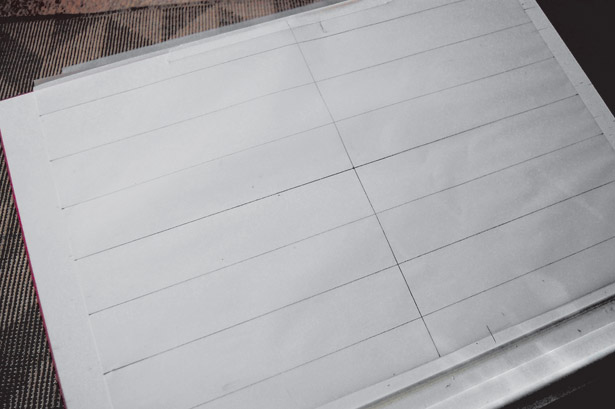
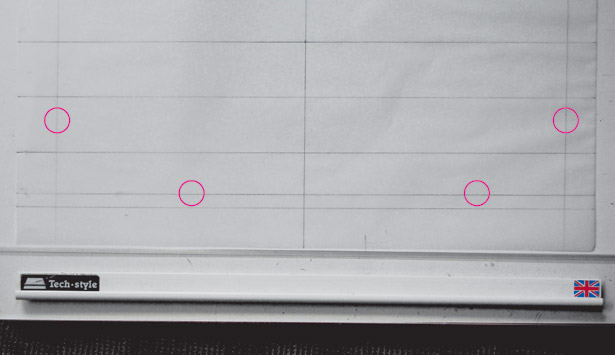
v Draw guides
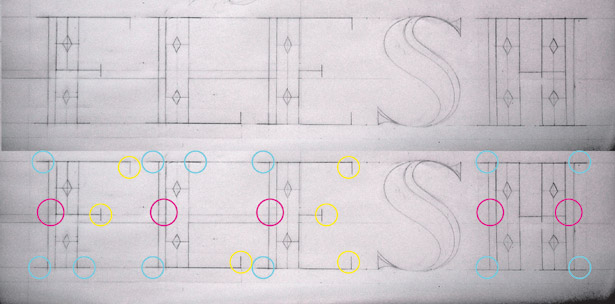
On the bottom sheet, beginning marking up some guides so you tin can place your characters accurately. Divide the page across its width and length to find the centre indicate of the paper. From that point, draw lines across the full width in 4cm increments, as shown here.
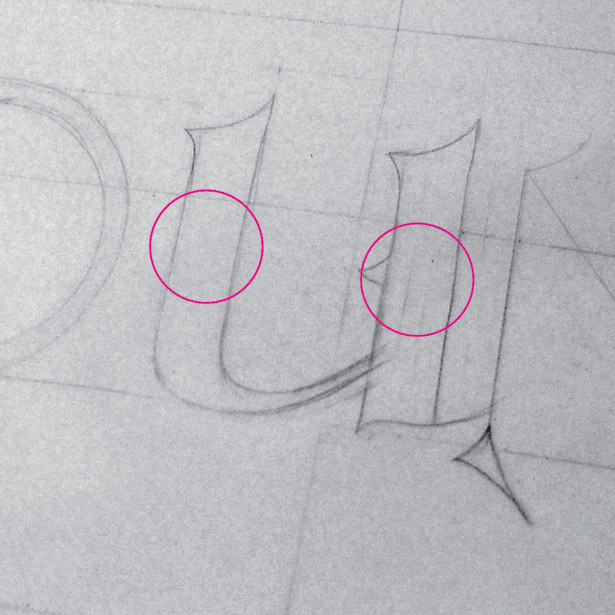
6 Uncomplicated rules
Our first discussion has vi characters, which we'll infinite as across the top. Still, we need to lay down a couple of rules. For case, the o and north need to be wider than the d, u and due south. Aim for around 1cm for the width of the u's stems (marked in the image).
7 Sketch characters
This footstep requires a bit of trial and error. Start by loosely sketching your characters, paying attention to the spacing across the full width of the page and between each graphic symbol, as well every bit their meridian. Don't attempt to be exact: only get a feel for the drawing and spacing.
eight Introduce consistency
Adjacent, make some slight changes to some of the characters to introduce consistency. Note the o here, which now has a vertical stress to the centre. Written report your characters, checking each one to see where consistency tin can exist incorporated.
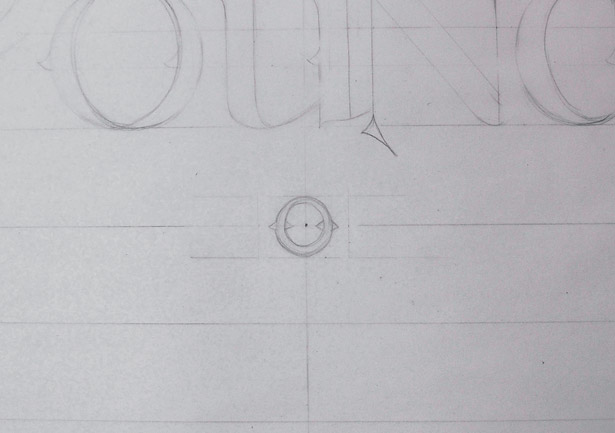
9 Draw o
Once yous're happy with how your first word is working out, it's fourth dimension to move on to the side by side i. In our example, this is 'for'. I've begun past drawing the central o smack in the middle of my folio, which fills upwards a space that's around two.5x2.5cm in size. I've then gone on to space the f and r equally on either side. Note that you'll demand to take into account the spurs on the o and the serifs on the r when you lot're doing this.
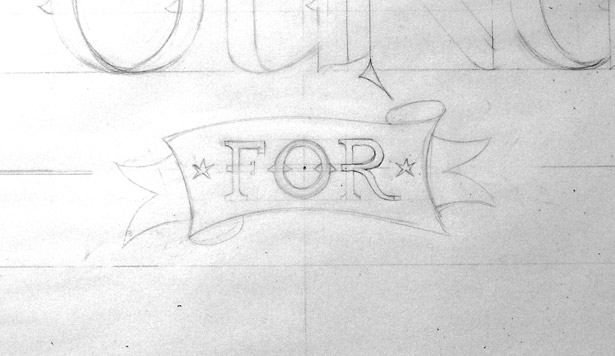
10 Tie a ribbon
Fourth dimension to add some decoration. Identify two stars evenly from the f and r and so start tackling a ribbon shape. Give the 'for' some breathing room and ensure you keep the width and height equal throughout the four sections: the front, the wraparound and the ends.
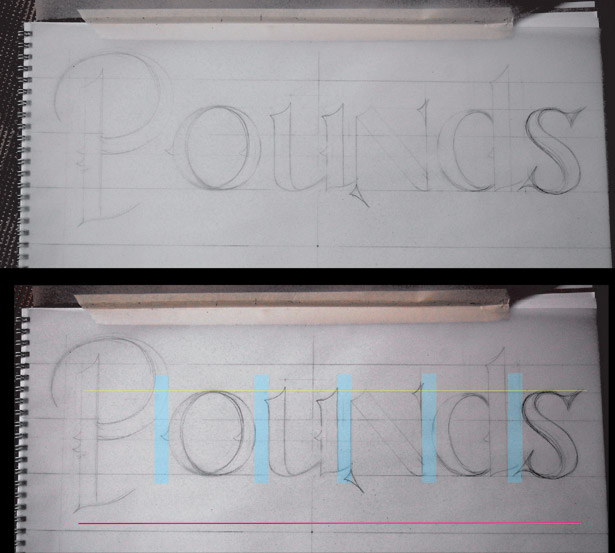
eleven Flesh it out
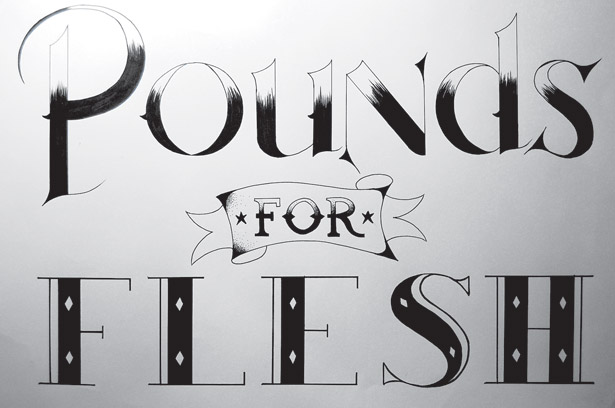
Now allow'southward move on to 'Flesh'. Measure the width of 'Pounds', adding vertical guides aligned to the stem of P and the end of southward to employ equally start and end points. Then create a baseline by drawing a guide 1cm above the everyman guide already in place.
12 Strike a balance
Begin sketching out 'Mankind', trying to strike a balance betwixt each letterform. Most of these characters (each five.5cm wide) are made of the same parts. The stems are 1.5cm wide with a line set 5mm to the left. I've marked up more consistencies to consider, too.
thirteen Describe a bend
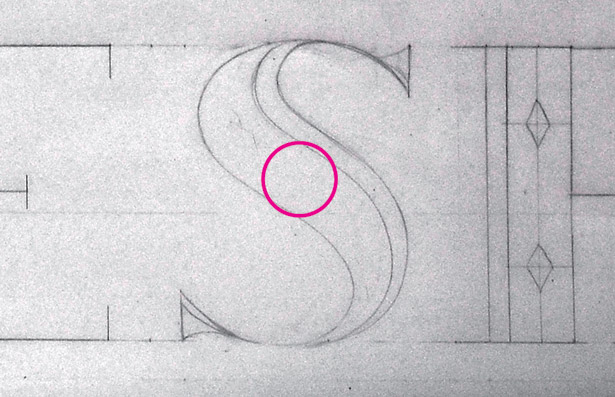
The letter s will be the trickiest – with the other characters existence so straight, it will stick out like a sore pollex, throwing off the balance of the discussion. Keep the s'due south bend at 1.5cm in the heart, so information technology matches the stems in the residual of the characters.
xiv Finesse it
Once you're happy, it'southward fourth dimension to use the peak sheet of tracing paper you attached earlier to really add together finesse to your drawing. This should be the fun function. Call up that you can simply replace the paper if you need to start over because y'all think you tin can do better.
fifteen Ink up
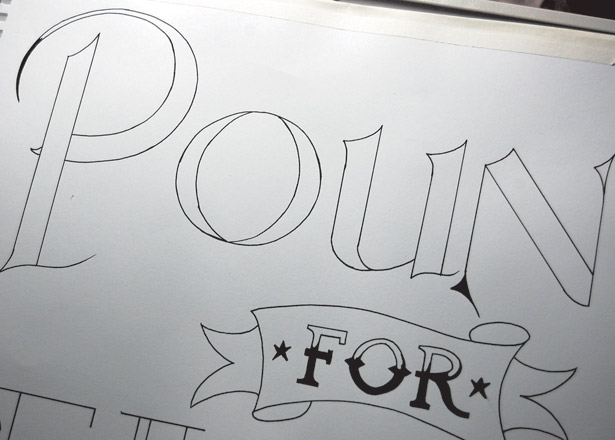
When yous've completed the top sheet, it'due south time to utilize it equally the template for inking upward a final version. Remove the bottom sheet of tracing paper and identify a fresh new sheet over the top, sticking it down with masking record. Begin tracing your outlines with a pen.
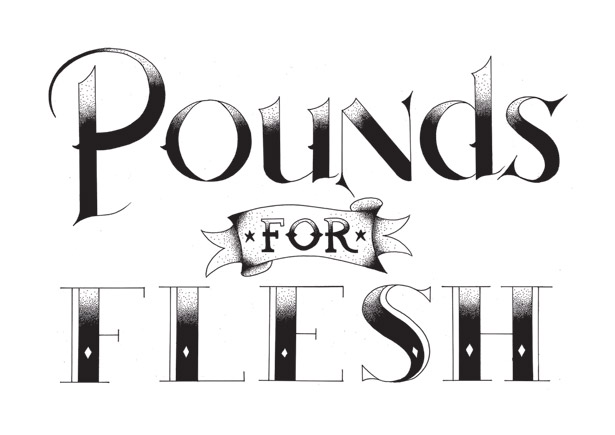
16 Add effects
With the outlines ready, permit's fill up them in. Instead of making them solid black, yous might want to endeavor out some effects. I've experimented with creating the illusion of light with stippling, or making strokes that fade as they pass into the low-cal.
17 Experiment
Don't be agape to experiment: yous can easily replace the summit sheet, so you don't have to start again from scratch. I messed up 'Flesh', making the lines too thick and creating a dodgy H, and then I started over on a new peak canvass. When y'all're finished, it'south fourth dimension to scan it in.
18 Open files
Browse at high res and open up the files in Photoshop. If, like me, you only accept an A4 scanner, stitch the two pieces together and select Image > Adjustments > Levels. Tweak the sliders so that the blacks go darker and the whites get lighter, creating more dissimilarity.

nineteen Photoshop magic
At present choose Select > Colour Range. Click on the highlighted expanse and press OK. Next, you should create a new layer, keeping the marquee selection around the object. Hit Shift+Delete. Select a colour you like and printing Return. You now have a free object that you can use as you please.
For more than info on type terms and tips, check out the What is Typography? and best gratuitous fonts posts on our sister site Artistic Bloq.
Related manufactures
Source: https://www.creativebloq.com/netmag/create-font-2117095
0 Response to "How to Upload Custom Fonts in After Effects"
Post a Comment